WordPress is and stays as the best alternative to a custom coded website. WordPress is loved all over for it’s customization options. Images are like the soul of any website. Good images convey a strong message. As content takes prominence the demand for good images will keep increasing day by day. Users want to see sites with good quality images. There often exists a trade-off between quality and image size. Increase the quality, image size increases. And this becomes a headache for most of the webmasters and WordPress users.
- Also learn: How to create image site map in WordPress
Suppose a page has more than 10 to 20 images. And all are above the size of 50 Kb, then if the page size is around 1 MB then almost 70-80% of page size would have come from the images. If those images could have been reduced in size, then speed as well the number of http requests could have been reduced. As a blogger, we should always focus on faster loading of our pages. In this case, I will share some tips to compress images on your WordPress blog to improve the loading time. I will also share some additional tips which will further help you to make your WordPress Blog faster.
Contents
How to Compress WordPress Images for faster loading :
Step 1 for this would be to select a proper image format to display your images. The popular image formats include jpeg, png, gif and bmp. The png format offers very high quality images but they are comparatively very large in size. The GIF images are good but only for images with text based content or monochrome images. Jpeg images are best suited for web content. Recently a new format of images have also been used on the Web. These are images of .webp format. These images load progressively rather than loading all at once. So, they are the best from all. But it will be a long time before they become mainstream. Google pagespeed does serve images in webp format when it serves them through its CDN.
So, answer as of for now for images on the web would be jpeg according to me.
- Also read about WordPress plugin to Generate Featured Image for Old Posts.
Step 2 : Compress the images.
You can use several online as well as offline tools for compressing the images before uploading them to your WordPress media gallery. I usually rely mostly on offline compressing using Imageoptim tool on my Mac. This is a light-weight tool and is completely free.
Though, this method would work when you are on Mac, or you are the only person writing on your blog. If you have a Guest blogging enabled blog, you should definitely take help of some of the best Image compression tools and WordPress plugins to reduce the size of images.
Now, lets look at some of the best solutions.
Dynamic Drive’s online image compression tool :
The image compression tool offered by Dynamic drive is among the best. You can upload your image, select the required format. And it will show you the image after compression in varying degrees of quality from 100% to 10%. You can choose the one you deem fit and less on size. You can access it here.
Image Optimizer.net :
They provide both online image compression as well as a tool for offline work. Their tool can be downloaded to your desktop and used for batch compression of image files. The tool can be accessed and downloaded from here.
WP-Smush.it WordPress plugin :
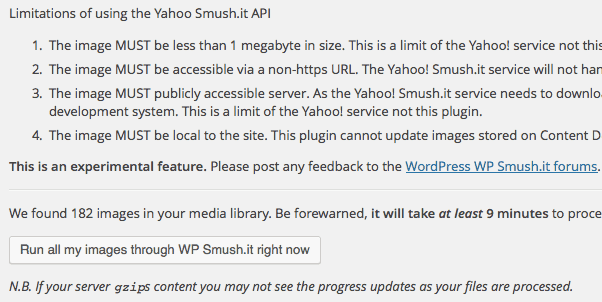
No image compression tutorial is complete without the mention of this plugin. The WP smush.it plugin works on Smush.it API provided by Yahoo and compresses images by removing unnecessary JPEG meta data. It compresses images in a loss-less way. More over, it also offers a feature call Bulk smash.it, which will let you reduce the size of previously uploaded image. Earlier managed WordPress hosting company WPEngine added Smush.it! plugin as disallowed plugin due to memory usage, but later on when WPMU team started taking care of plugin development, now it’s supported back by WpEngine hosting. Here is a video which will help you to understand how to use Smush.it plugin:
If you have a large number of images and can’t manually upload them one by one, then WP-Smush.it plugin is the best tool for you. You can download the plugin here. In case if your hosting is now allowing Smsuh.it plugin, you can use other alternative WordPress image compression plugins like CW image optimiser, Ewww Image optimizer.
Adobe Photoshop and Microsoft Picture manager :
By removing the white backgrounds in images by using the erase tool in photo-shop you can also decrease image size. In Microsoft’s Picture manager there are options to optimize images for the web by choosing where to include them. It may be attachments, uploads etc.
Final conclusion regarding image compression.
You have to follow the best practices to ensure that images are always loaded in a fast manner on your websites. Another noteworthy thing is that you should never re-size your images via HTML. Always use an image less in size/resolution if you really want a smaller resolution. And do use thumbnails which are smaller in size if you change your theme. You can do so via the regenerate thumbnails plugin. I usually use Snag It software to capture screenshot and use it to resize the image. Later on I use Imageoptin plugin to further reduce the size of image, and then I upload it on my server. This has become a part of my daily blogging task, and I also recommend you to do so. This hardly takes less than 30 seconds, but is very helpful. Along with this, I have Smush.it plugin installed on my blog, which takes care of last bit.
NOTE : If an image is 15 Kb or less in size then it can be served via a single HTTP request. So keeping this in mind while optimizing images can be helpful. And by doing this you can reduce your number of HTTP requests and improve page load time too. Also, integrate a CDN network (I recommend MAXCDN), which will further ensure that your WordPress blog images will not slow down your blog.
- Must read: How to speed up your WordPress Website
Compressed images retain the quality of the original ones and are always lower in size. So, it’s a win-win situation in terms of both quality and size. More over, compressed images help in saving your server bandwidth. Do let me know if you follow the practice of image compression before making your blog post live? What all methods are you following?
If you find this tutorial useful, do share it on Facebook and Google plus. Also, do join us on Facebook for WordPress Tips and tricks updates.


thank you….very important article
@Hipnoterapi
Happy to help. Looking forward to hearing much more from you.
Hello, thank you for summary but I still don’t know which one is the best… WP.Smush.it is good and simple but does not show me the best results.
@Gayatri
I use WP Smush.it & it’s been working out great for me. If you are on Mac OS, I would also recommend you to use ImageOptim which is pretty cool: https://imageoptim.com/mac