

Looking to start a lifestyle blog and maybe even make money doing it?
That’s awesome!
But I know firsthand how overwhelming it can be when you’re trying to start your first blog.
You just want to start writing…but before you can do that, you have to deal with all the technical stuff.
To try to make things easier and get you on the right path to success, I created this guide tailored specifically to how to start a lifestyle blog. In this post, you will learn:
- Why WordPress is the best platform for your lifestyle blog
- How to pick a niche and domain name
- How to sign up for affordable web hosting and install WordPress
- Some themes and plugins to give your lifestyle blog new functionality
- How you can write your first blog post and make your lifestyle blog a success
There’s a lot to cover, so let’s get going so you can start blogging in no time!
Contents
Why WordPress Is The Best Platform To Start A Lifestyle Blog
At this point, there’s only one blogging platform that I recommend to bloggers who are just starting out – Self-hosted WordPress.
Located at wordpress.org, self-hosted WordPress is different than wordpress.com.
Yes – I know it’s confusing because they’re both called WordPress! But here’s why you want self-hosted WordPress (wordpress.org):
- It gives you more flexibility to customize and tweak your site to really make it your own. You’ll be able to install your own “themes” and “plugins” to add whatever functionality you want (more on this later!)
- You have 100% ownership of your site, whereas wordpress.com has all sorts of rules and limitations you have to follow.
- You have full control to monetize your site however you want, which is really important if you plan to make your lifestyle blog a business (or even just a side hustle)
Self-hosted WordPress is what powers over 37% of all the websites on the Internet, so you’re in good company when you use it to start a lifestyle blog.
You will need your own “web hosting” to use self-hosted WordPress, but it’s super easy and non-technical. I’ll show you exactly how to get set up in a few sections.
Step 1: Pick A Lifestyle Niche That You Can Stick With

No matter what you blog about, building a successful blog takes time. You can’t expect just to start writing posts and instantly have readers, income, or whatever else you’re aiming for.
For that reason, you need to pick a lifestyle niche that you’re truly passionate about so that you can stick with it for the long-term.
I can’t tell you what this is because it’s unique to you. But just try to ask yourself this question:
“Will I still want to write blog posts about this in a year?”
If your answer is “yes”, that’s a great niche!
And what makes it even better is if other people are interested in that niche, too.
Step 2: Pick A Great Domain Name
Your domain name is your lifestyle blog’s permanent address on the Internet. For example, my domain name is WPSutra.com.com.
While it is technically possible to change your domain name, it’s a messy process. So ideally, you want to stick with your domain name for a long time.
For that reason, it’s important to put some thought into picking a great domain name.
You can be pretty creative here. But here are two general tips:
- Don’t use numbers or hyphens in your domain name – it’s confusing and hard for people to remember.
- Try to use a .com domain name if possible.
One easy way is to use your name. Or, you can use one of the many domain name suggestion tools.
Don’t worry about buying a domain name – I’ll show you how to get a free one in the next section!
Step 3: Sign Up For Hosting And Get Your Free Domain Name
Now, you’re ready to sign up for hosting.
So what is hosting?
Basically, it’s the “engine” that powers your lifestyle blog and makes it available to people from around the world. Some sort of web hosting powers every single website in the world.
Sounds a little complicated, but I promise you it’s not.
Web hosts have made it super easy for even non-technical people to use. And it’s not that expensive, either – you can pay less than $4 per month.
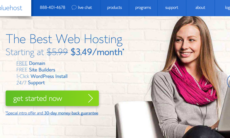
For new bloggers, I recommend Bluehost because it’s affordable and plenty powerful for a new blog. Bluehost will also give you a free domain name and makes it easy to install WordPress.
Here’s how to get set up with Bluehost:
Step 1: Create Your Bluehost Account
To get started, click here to get my special Bluehost discount and then click get started now:

Since your blog is brand new, you can pick the basic plan on the next page – you can always upgrade later if needed:

Then, you can choose your free domain name. Just enter your desired name in the new domain box and click next:

Then, you’ll need to enter your account information and choose your hosting package.
You’ll need to pay for at least a year upfront – but you get bigger discounts if you pay for multiple years. Feel free to uncheck all the add-ons – you don’t really need them right now, and they make things more expensive:

The whole thing should cost ~$59 for your entire first year.
Step 2: Install The WordPress Software
Surprise! You don’t have to do anything here (thanks to Bluehost). When you sign in to your new Bluehost account, Bluehost should give you an option to install WordPress right away automatically:

Once you install WordPress, you can log in to your WordPress dashboard by going to:
yourdomain.com/wp-admin.
Step 4: Choose A Lifestyle Blog Theme
Your WordPress “theme” controls how your lifestyle blog looks. Think of it kind of like your blog’s clothing – it doesn’t change any of the “underneath” stuff – it just makes it look pretty on the outside!
There are thousands of free and premium WordPress themes to choose from, so Google can be your friend here. But to get you started, here are a few great free and paid themes for lifestyle blogs.


Found The Perfect Theme? Here’s How To Install It
If you need help using your theme, check out my beginner’s guide to installing a WordPress theme.
Step 5: Install Some WordPress Plugins
While WordPress themes mostly affect outward appearances, plugins add new features to your site.
You can find pre-made WordPress plugins for pretty much everything.
Need to add a contact form? There’s a plugin for that. Want to add social share buttons so visitors can share your content? Yup – a plugin for that.
It’s hard to give specific plugin recommendations because it depends on what functionality you want, but here are some must-have plugins for bloggers.
Here’s How To Install WordPress Plugins
If you need help installing these plugins, check out my beginner’s guide to installing WordPress plugins.
Step 6: Write Your First Blog Post
Now, you’re finally ready to write your first blog post!
Writing your first blog post is super simple with WordPress.
Go to Posts → Add New in your WordPress site’s dashboard:

Then, you can enter your post in the text editor – it’s a lot like Word in that you can use the toolbar to add formatting (like bold, italics, etc.) or insert a link.
You can also add categories for your blog post on the right-hand side.
And once you’re ready to make your blog post public, you click the big blue Publish button:

How To Grow Your Lifestyle Blog Going Forward
At this point, you have a real-life, working lifestyle blog – congratulations!
That marks the end of this tutorial. But before I finish this post, I want to share some resources that can help you grow your lifestyle blog and make it a long-term success.
As you start putting out more content, you’ll want to read up the search engine optimization.
You’ll also want to consider other ways to drive traffic to your blog.
And since lifestyle blogs do well on Pinterest, you should put a special focus on learning how to get more Pinterest followers.
I hope you found this guide to launch a brand new lifestyle blog helpful and I wish you and your lifestyle blog the most success possible!

Do share this tutorial with your friend who has been talking about starting a lifestyle blog.
Here are a few hand-picked guides for you to read next:


ADD COMMENT