I have already shared a detailed information on the difference between WordPress.com and Self hosted WordPress blog, and for a newbie getting started with WordPress seems to be scary, but in reality, WordPress is the best Blogging platforms you can ever use. The very first step of getting started with your Website or blog with WordPress is to Install WordPress on Webhost you own. Official WordPress Codex offers a detailed WordPress installation tutorial for cPanel, and it looks like some scary coding for nontechnical people.
- For beginners: What is WordPress?
Since WordPress is one of the most popular Blogging platforms and CMS, most of Webhosting offers scripts like one click installer to install WordPress with GUI interface and you don’t need to touch any file or make any manual changes in the core file. Ex: WP-config.
In this tutorial, I will be sharing how to install WordPress on Hostgator cPanel within 5 minutes and seeing your site up and ready. The process is very simple, and anyone with limited computer knowledge can understand and do it in no time.
DIY guide for Installing WordPress on Hostgator
Hostgator is one of the popular WordPress Webhosting, and they offer various unlimited shared hosting plan, which cost less than $10/month. My recommendation would be grab Baby hosting package and a domain and get start with your WordPress blog in less than 5 minutes.
- Grab Baby plan from Hostgator (Use coupon HGUsers for 30% off)
Once you are signed up with Hostgator, you will get Email containing all login information. Simply click on cPanel link from the Email and use the Username and password provided to log in.
Once you are logged in, you will be presented with cPanel dashboard. (This is standard dashboard offered by cPanel). Now, I will share the complete WordPress installation tutorial with screenshots. If you are still stuck anywhere, drop a comment with your query, and I will love to help you out.
Now, click on Quick install under Software/Services section under cPanel. This is a free service by Hostgator cPanel, using it you can quickly Install WordPress or other popular Web platforms like Drupal, Joomla, PHPBB and many others.
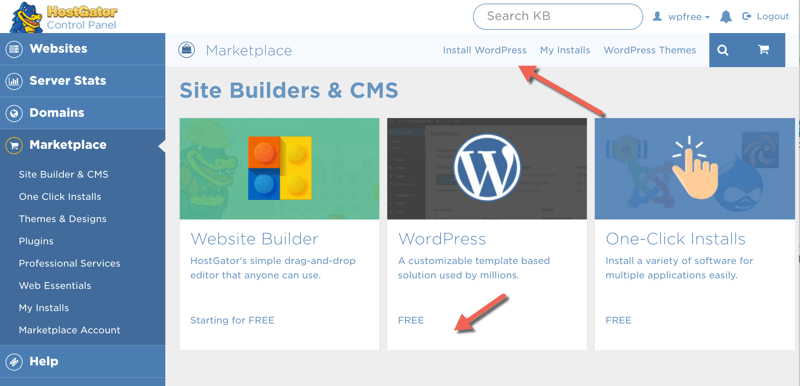
Now, on the next screen, select WordPress, and you will be taken to next screen, where you need to select New installation.
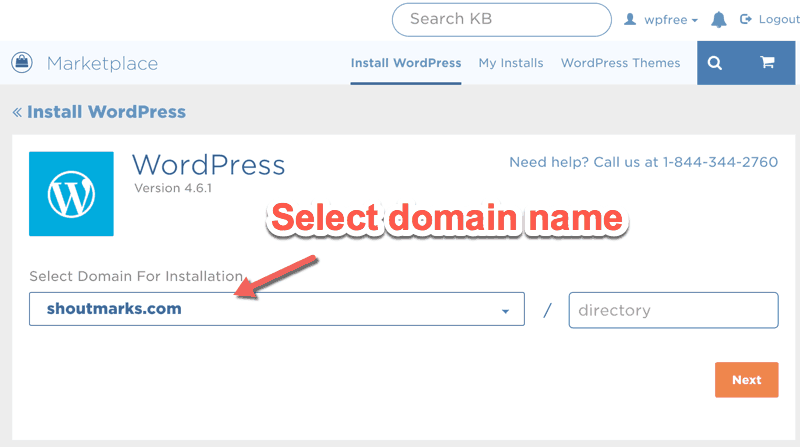
On the next screen, you need to select the domain name where you wish to setup WordPress.
Install on Domain: Here you can select the domain where you wish to install WordPress. Since Hostgator offers multiple domain hosting, you can always add addon domains. If you just purchased one domain while buying hosting from Hostgator, simply select the domain and proceed to next step.
Install in Directory: If you wish to install WordPress blog in the sub directory. For ex: domain.com/Blog, you can add directory name here. Since our goal is to have WordPress installed on the main domain, we will keep it blank.
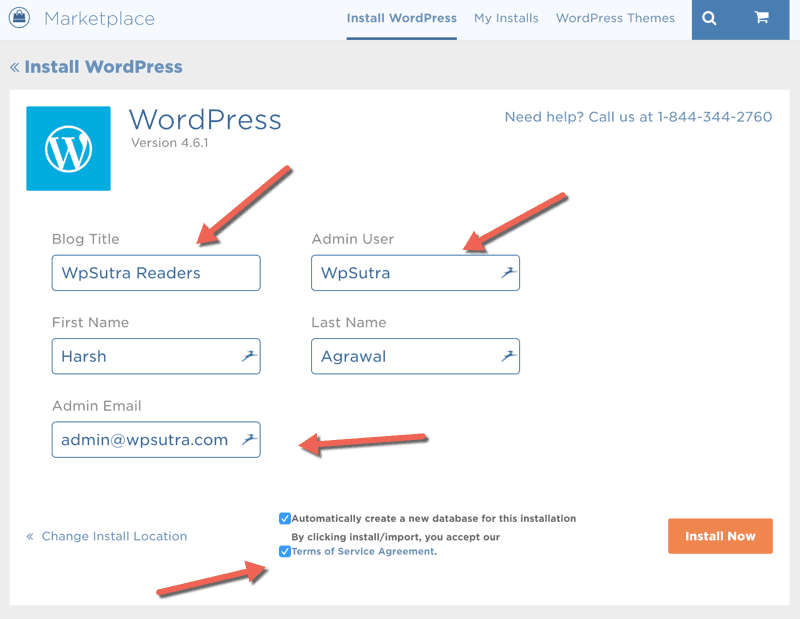
Add admin details and simple base configuration details. Check out below screenshot, where I have added all the details and below I explained all the fields.
You can always change it according to your need. For beginner user, I recommend to follow as I mentioned in below steps:
Admin access data: Here you will be providing login username and password, which will be used later on to login to your WordPress blog dashboard. Try to use a Complicated password for better WordPress security and do note down the Administrator username and password you have added here.
Base configuration:
These details you can always change later, but for making your work easier, I will explain them in brief.
- Admin Nickname: Name you to wish to show to public under post name.
- Admin Email: Enter the Administrator Email address which will be used to send Email notifications (Comments or any other) for your blog. This will be used for password recovery too, so provider a Working Email address.
- Sitename: Name of your site. Ex: WPSutra Readers
That’s it and now click on Install now.
That’s it, and now you have installed WordPress on your Hostgator cPanel account. Simply go to domain.com/wp-admin (replace domain.com with actual domain name) and login to your WordPress dashboard.
What to do after Installing WordPress?
By following above tutorials, you have done the most important and basic step of getting your blog up and running. Though, to make most out of your blog, you still need to make some changes from the dashboard and install few plugins to maximize the functionality and performance of your WordPress blog. I have already shared about them earlier. Here are few tutorial links, which will help you to understand and to make your WordPress blog perfect for the launch:
- Learn How to Install WordPress Plugins
- How to setup WordPress Blog for the first time
- Must have WordPress Plugins and their uses.
- How to create WordPress Blog feed using Feedburner
That’s it for now, and with few minutes of work, you can easily get your self-hosted WordPress blog under your domain name. I hope, this tutorial solved most of your queries related to WordPress installation on Hostgator or any other cPanel hosting. If you still have any query, feel free to ask via comments.






Thanks Harsh good to see you here, Another nice one post as always you create rich subject oriented content. Anyway great job.
@Annish
Happy to help. Looking forward to hearing much more from you. 🙂