When it comes to windows, there are many ways we can install WordPress locally, for example, we can use standalone software like Instant WordPress or installed WordPress using XAMPP, but when it comes to Mac we have limited option. Recently, I installed WordPress on MacBook running OS X Yosemite, and since I find it very useful to have a local WordPress installation to write tutorials and to try out new things, finally today I decided to get a local WordPress environment for me. This tutorial will be helpful for people like me and you, who loves WordPress and planning to get a Local WordPress installation on MAC system.
Preparing for WordPress installation on Mac: Download Mamp
To get started with Local WP installation, we need to download MAMP and WordPress. Download links are given below:
Along with this, you need to do few editing in Wp-config file and need to create a database via phpMyAdmin, which is very easy. Make sure to take advantage of Sticky Notes app in Mac to copy the details. MAMP is a software to create a personal Web server on your local system, and they offer a pro version too. Though, for our purpose a free version of MAMP is good enough to get started. Sadly, they don’t let download just the free version so the total size of downloading MAMP would be close to 150 MB.
Install WordPress on Mac: A Complete DIY Tutorial
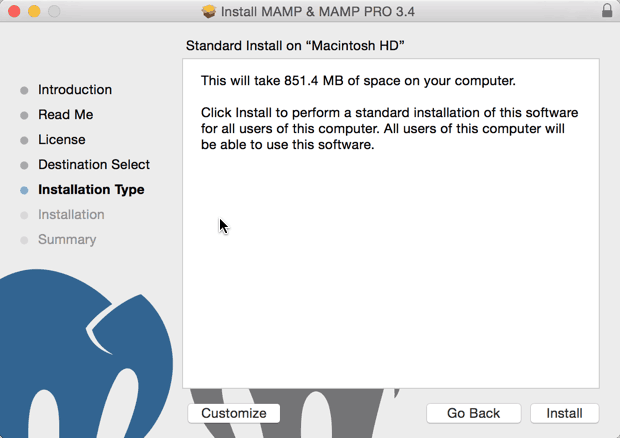
So, once you have downloaded MAMP, install it like any other Mac software. If you are new to Mac, you can check out this video to learn to install the app on Mac system.
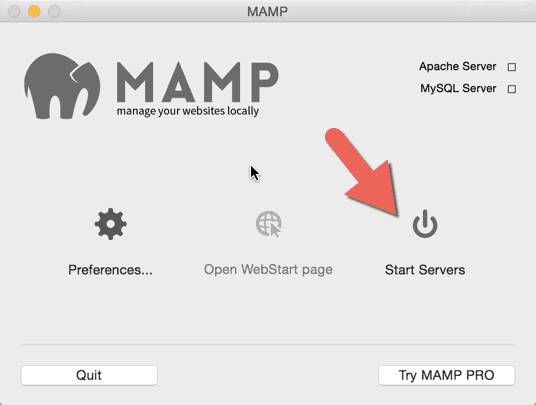
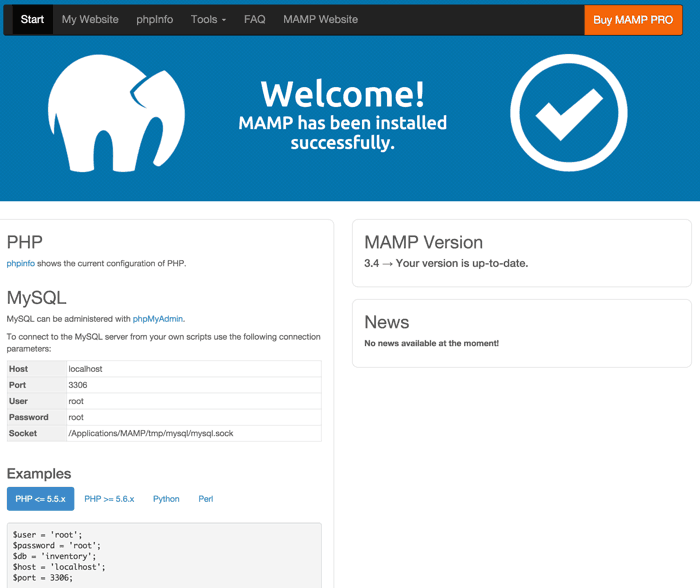
Once MAMP is installed, open Mamp and start the server to check if it’s working fine or not.
This is how the screen looks like. Click on Start servers to start the Mamp on your system. Once the server starts, it will automatically open http://localhost:8888/MAMP/ in a new browser tab.
Create Database for WordPress locally:
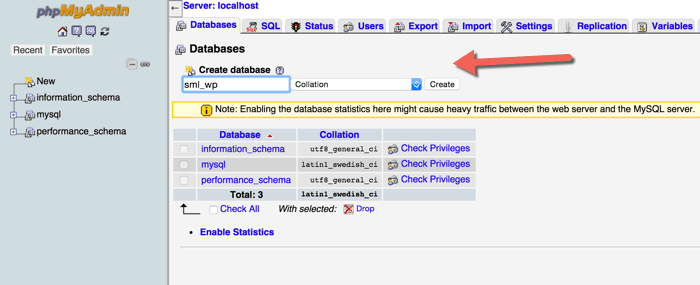
The next thing we need to do is to create a local database for WordPress installation. On the MAMP start up the page, click on Tools > PHPMyAdmin to access PHPMyAdmin. On phpMyAdmin and click on Database to create a new database.See the screenshot to easily understand the process.
I have used sml_wp to create a database, and you can use anything according to your wish. Just remember the name of the database as we need it later for complete WordPress configuration.
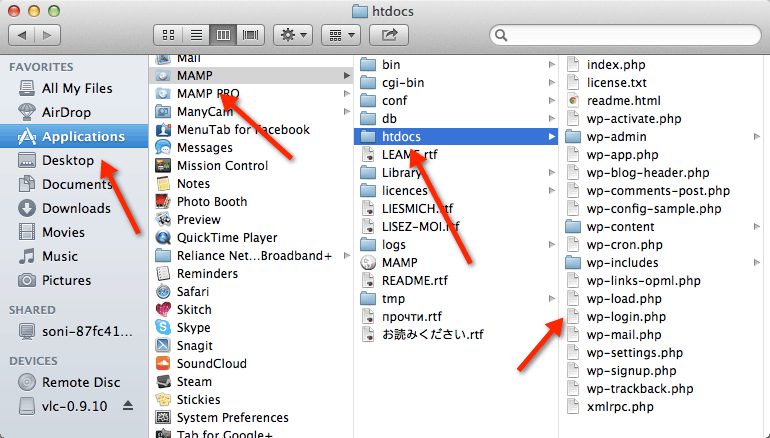
Now, you need to unzip WordPress file that you can have downloaded and go to Applications > MAMP> htdocs and copy the files from WordPress folder. See the screenshot:
Finishing WordPress Mac installation:
So far, you have installed MAMP, configured it and unzipped WordPress folder to MAMP. Now, we need to make little changes and we will have WordPress running on Mac. Now under htdocs, simply rename the wp-config-sample.php to wp-config.php And open it to enter database details and user detail.
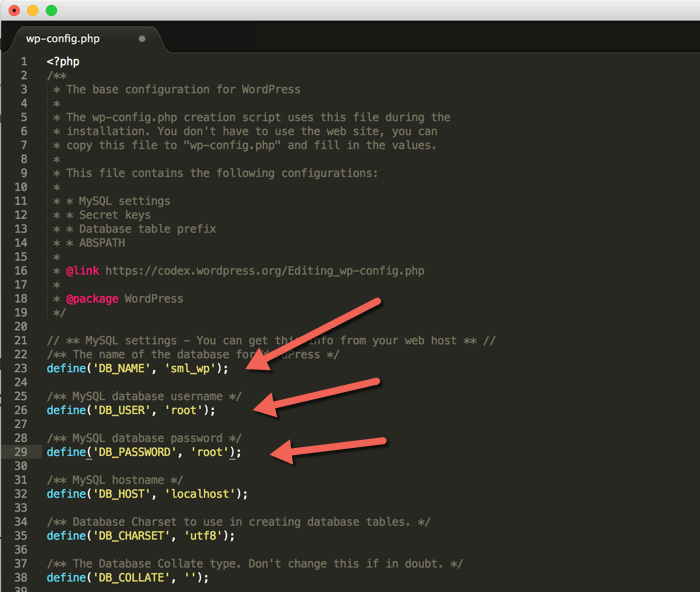
Open Wp-config.php and add the following details:
- Db name: Database you created. In my case : sml_wp
- db_user: root
- db_password: root
Here is a screenshot of my wp-config.php file after editing:
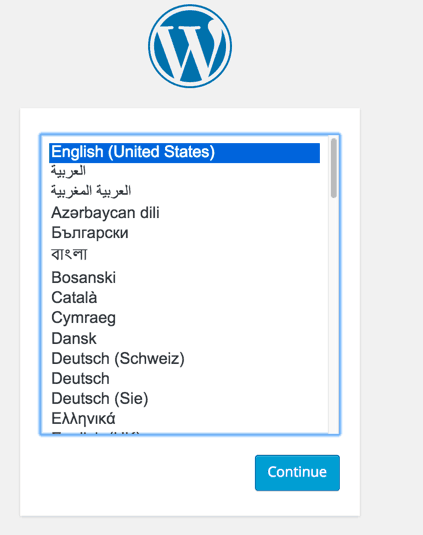
Now save the file and in your browser type http://localhost:8888/ and it will bring WordPress Install screen. The first step is to select the language of your WordPress installation.
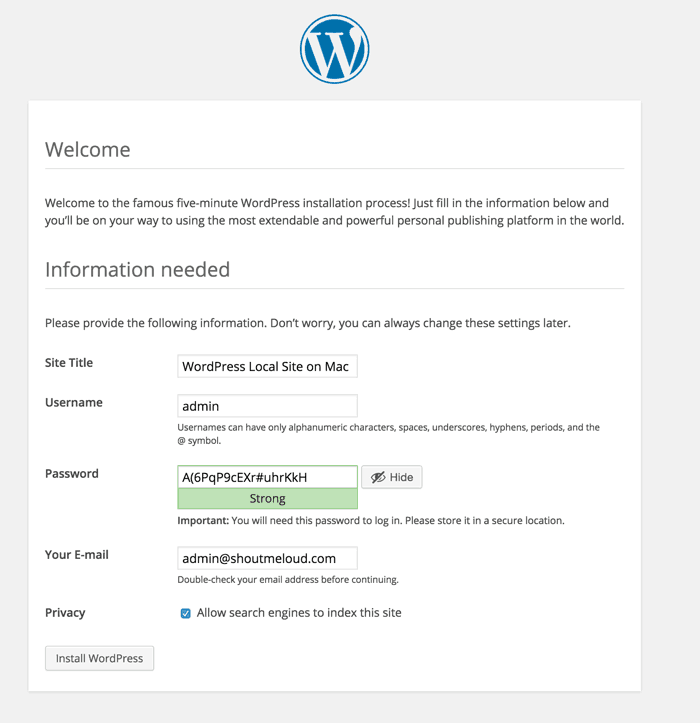
Click on Continue & on the next screen you need to enter basic details for your WordPress blog.
Click on Install WordPress & now WordPress is successfully installed Locally on your Mac OS. I have tested this with Yosemite & working perfectly fine. You can always add a theme by directly accessing htdocs/wp-content/themes under MAMP folder on your Mac.
So go ahead and enjoy using WordPress on your Mac OS and if you still have any questions about it, feel free to let me know via comments. If you enjoy this tutorial, don’t forget to share it on Facebook and Twitter. Do join us on Facebook for more such guides.




Once I got to the step to type http://localhost into my browser, I only got the default ‘It works!’ window rather than a WordPress Install window.
Just answered my own question by stopping my local Apache. Thanks for the help! This tutorial was great!
Hi, good tutorial and easy to follow, thanks!
I get to the part for typing http://localhost:8888 and the browser just returns “error establishing a database connection”. I’ve tried restarting MAMP and using different database names (making sure they match in wp-config file and the database in phpmyadmin), I’ve tried restarting the mac, I tried using 8889 and 8887, but still nothing.
Also, is there a way to update the local install with what I already have on the live blog, then to update the live blog with what I have on the local once I want to push an update?
Again, thanks for the tutorial, very easy to follow and clear instructions.
Best,
Josh
I got the “It Works” window instead of a WordPress Install window. Stopping local Apache and then http://localhost:8888/ returns this error message:
This site can’t be reached
localhost refused to connect.
Search Google for localhost 8888
ERR_CONNECTION_REFUSED
Any Guidance?