If you have just started your WordPress website and are looking forward to optimizing it for search engines, then the first thing that you should do is add your site to Google Search Console.
Google Search Console is set of tools offered by Google that provides reports and data. It helps you understand how different pages of your website appear in search results, on what search queries your site appears in results, and how often users click on your site from Google Search.
This data helps you to optimize your website’s pages and posts, and also helps you to formulate a content strategy for your website (i.e. what to write next).
It also notifies you about site errors which you can fix to speed up the crawling and indexing of your pages.
You can also submit a sitemap (an XML file that contains URLs inside of your blog and helps crawlers find them) of your website in Google Search Console.
But before you do any of that, you need to verify your website.
In this tutorial, I will show you how to add your website to Google Search Console (both website verification and adding your sitemap) using the Yoast SEO plugin.
Let’s begin…
How To Submit & Verify Your Website In Google Search Console
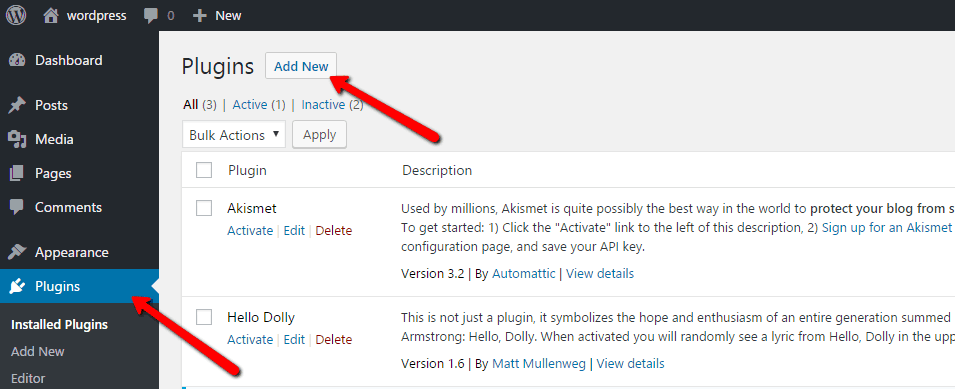
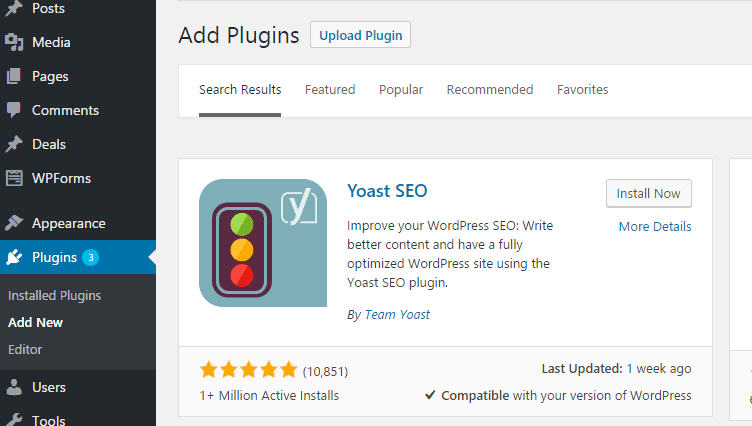
First, you need to have the Yoast SEO WordPress plugin installed on your WordPress dashboard. If you haven’t installed the plugin yet, follow the steps below.
- Go to your WordPress dashboard >> Plugins >> Add New.
- Type “Yoast SEO” in the search box and click on Install Now.
- Next, activate the plugin.
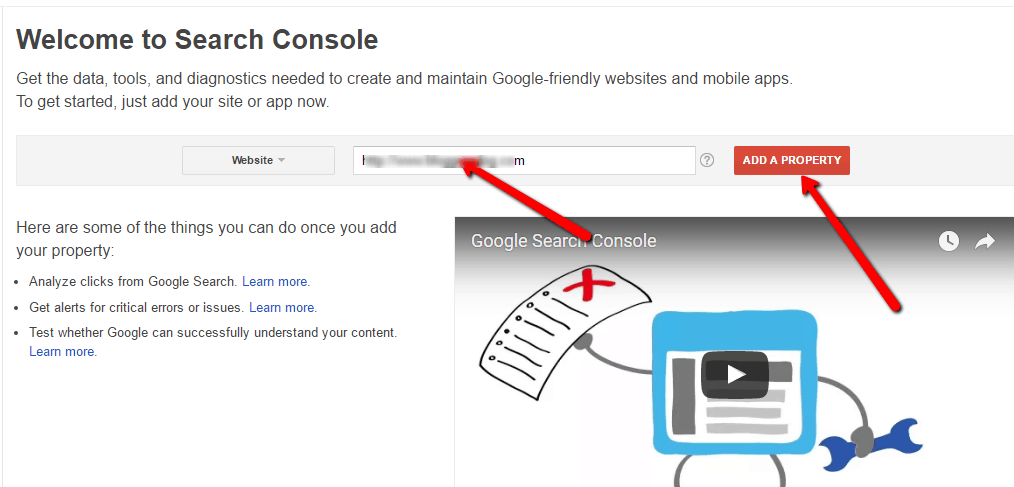
- Go to the Google Search Console and sign into your Google account.
- Enter your website URL and click on Add A Property.
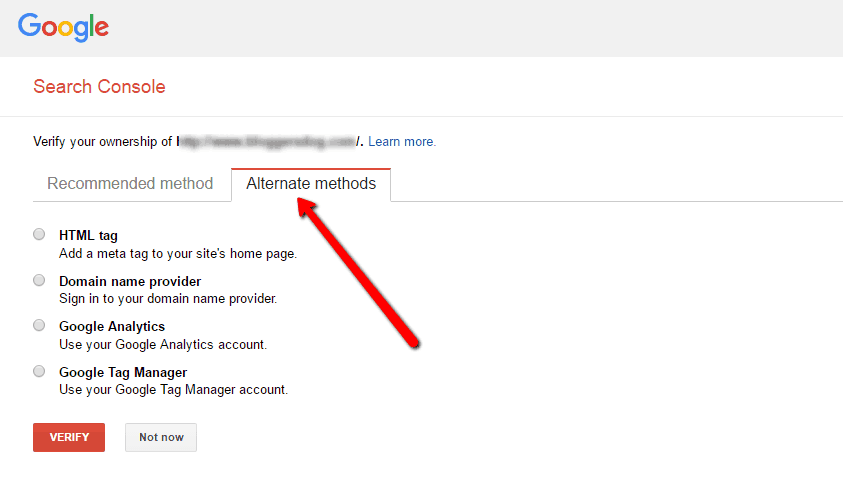
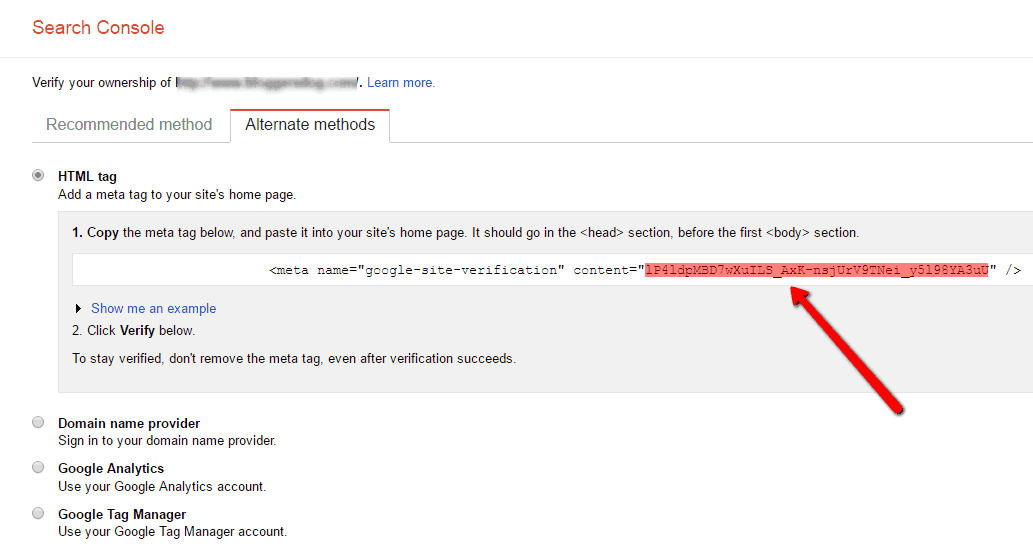
- You will be asked to verify the ownership of your site. Click on Alternate methods and select “HTML tag”.
- Copy the code. Only copy the part in quotations after the ‘content’ tag.
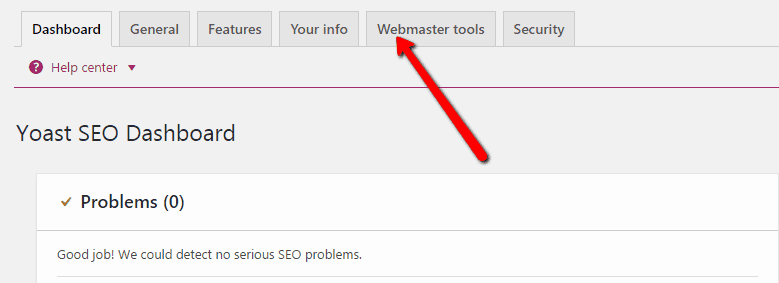
- Log in to your WordPress dashboard and click on SEO on the left side of the menu.
- This will open the Yoast SEO dashboard. Click on the Webmaster tools tab.
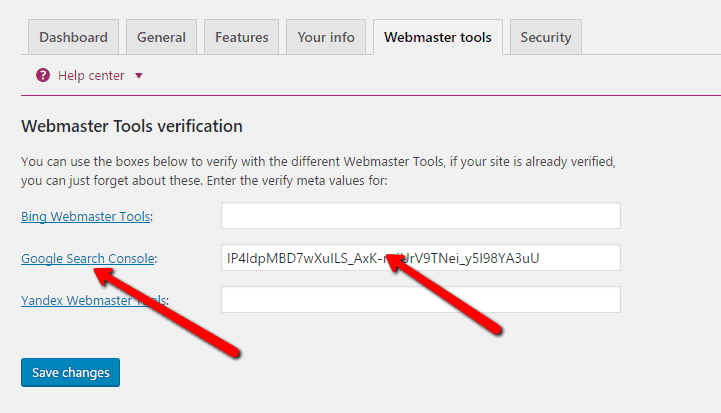
- Under “Google Search Console”, paste the code and click Save changes.
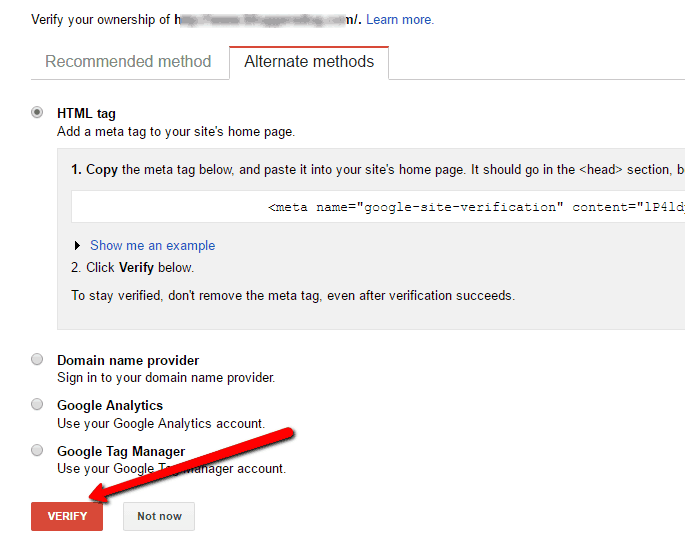
- Go to back to Google Search Console and click on Verify.
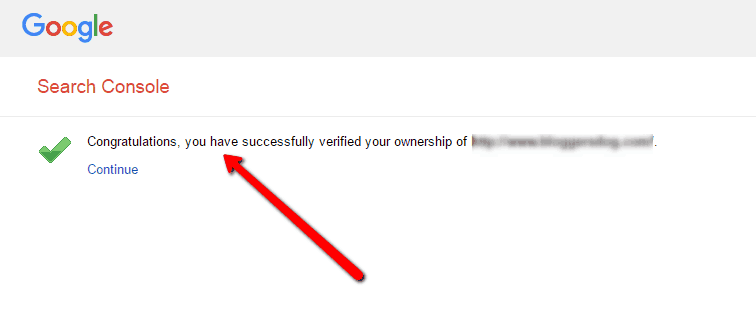
- You will see a success message: “You have successfully verified the ownership of the website.”
How To Generate XML Sitemap & Submit It To Google Search Console
Since you have now verified the ownership of your website, it’s time to submit your website’s sitemap. This sitemap will help search understand more about your site. This one file contains the link to all your posts & pages. Once you submit the Sitemap file, search engine crawler will use the links mentioned in your Sitemap file to effectively crawl your website. This meant your content will be added into search engine & you will start receiving organic traffic.
One major benefit that WordPress users get with Sitemap file is; once they have submitted the Sitemap file generated by a WordPress plugin, next time you don’t need to do anything after publishing a new post. Your sitemap file all be automatically updated & new link will be submitted to Google search.
This is one must do thing for every WordPress blogger. Just follow the steps mentioned below to generate & submit your Sitemap file to Google search console. For this tutorial, we are using Sitemap feature of popular Yoast SEO plugin. There are many other plugins as well, but Yoast is one of the best when it comes to WordPress SEO.
Here is how you can get started:
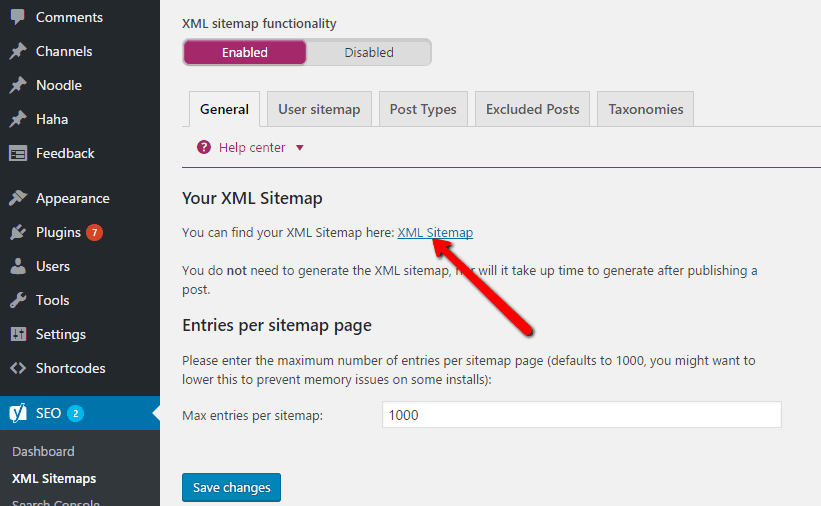
- Go to your WordPress dashboard >> SEO >> XML Sitemap.
- Copy the URL (only the part after ‘/’). Here is my Sitemap file link: https://wpsutra.com/sitemap_index.xml
- Go to Google Search Console and select the website (the same one that you verified earlier).
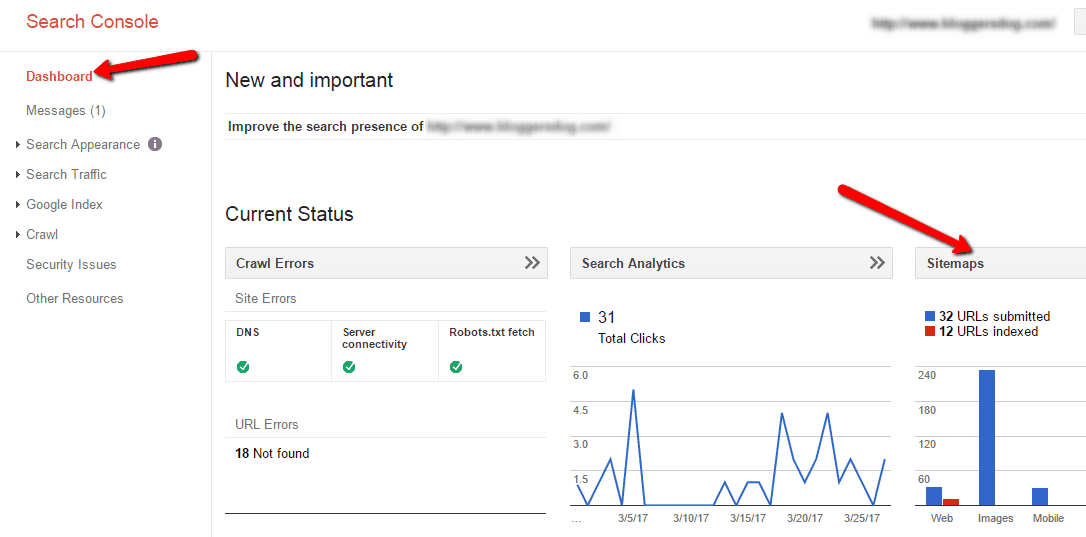
- Click on Dashboard >> Sitemaps.
- Click on Add/Test Sitemap.
- Paste the URL and click on Submit.
You will get a confirmation message when everything is done.
That’s it!
Remember when you submit a sitemap for a new website, it might take some time to see the index status. Once it’s done, you can see how many URLs are submitted via that sitemap and how many links are indexed by Google.
I hope the above tutorial will help you to add your site to Google’s Search Console. If you have any questions or need any help, do let me know in the comment section.
Like this tutorial? Do share it with your friends!




ADD COMMENT