Have you ever seen a website with a social media login option that allows users to log in with their Facebook or Twitter or Google accounts?
It’s a trend these days, and you will find these social media login options on most websites that you browse.
With Facebook being the most popular social media website, having a Facebook login button on your website would be a smart move.
Contents
Why Add A Facebook Login Button?
Having a Facebook login option allows users to directly log in to your website without having to go through the typical registration process.
It saves their time by cutting down on the necessary steps for signing up/logging in. No email verification is required, and they simply need to log in to your website with a one-click registration.
Isn’t that easy?
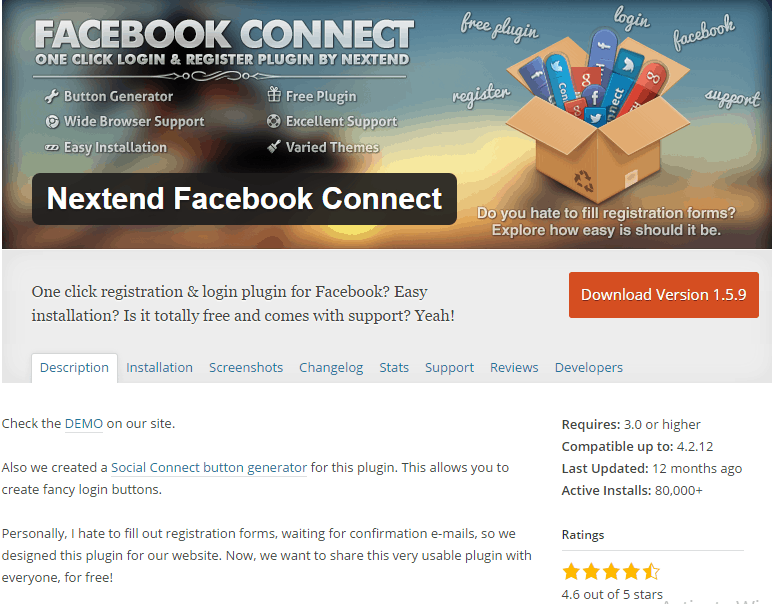
In the following tutorial, I will show you how to add a Facebook login to your WordPress website with the help of a WordPress plugin – Nextend Facebook Connect.
Though there are a couple more plugins – Facebook Login, Facebook Login Widget – Nextend Facebook Connect is the easiest to use and has a high user rating from over 80,000 active installs.
So let’s learn:
- How to install and activate the Nextend Facebook Connect WP plugin.
- How to create a Facebook App.
- Connecting the plugin with your Facebook App.
Goal: Add A Facebook Login Button To WordPress Website
Let’s get started.
Installing & Activating Nextend Facebook Connect WP Plugin
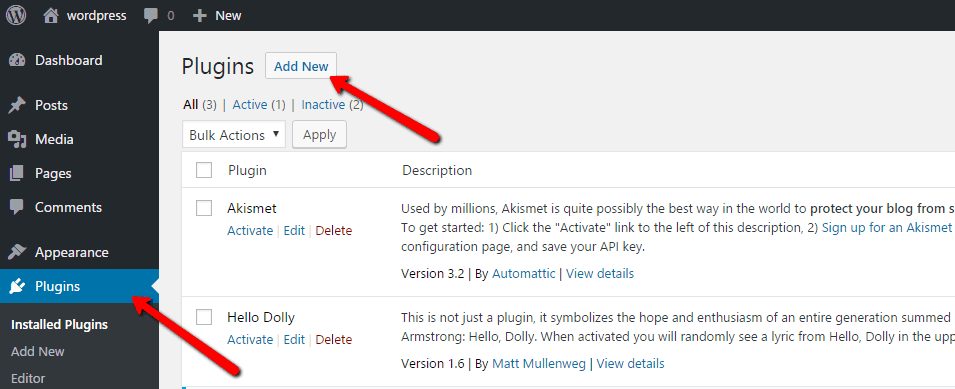
- Go to your WordPress dashboard – Plugins >> Add New.
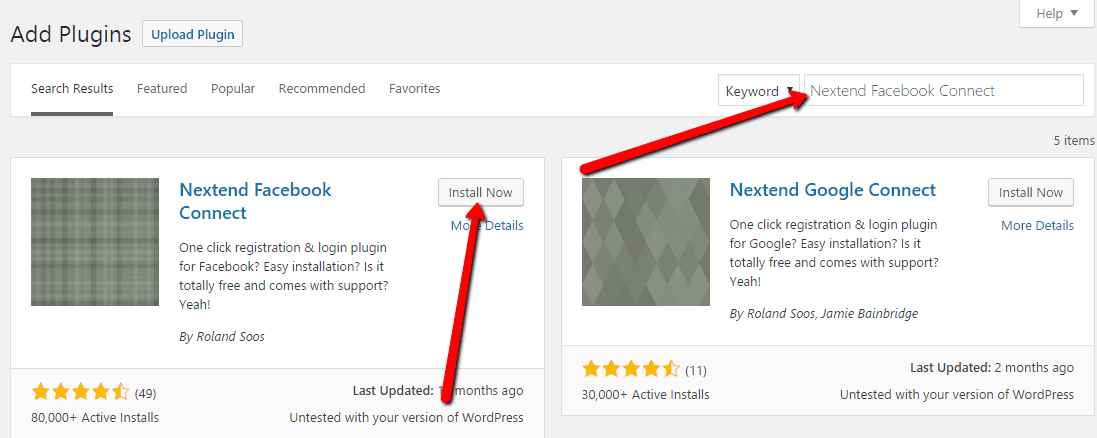
- Type “Nextend Facebook Connect” in the search bar, and install the plugin.
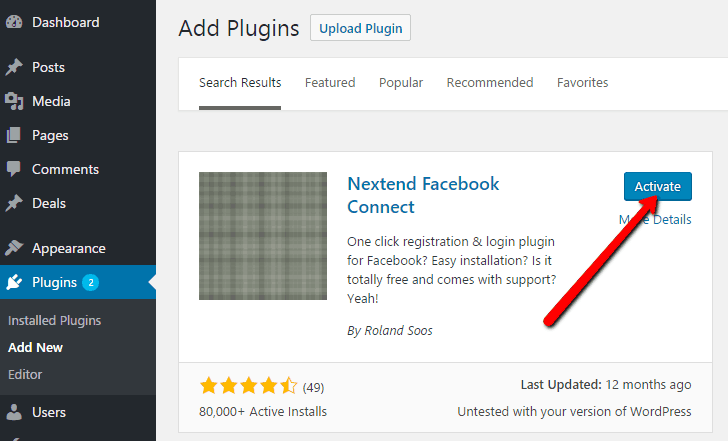
- Activate the plugin.
This will successfully install the plugin on your WordPress dashboard.
Creating A Facebook App
The plugin requires a Facebook App to connect to. If you already have a Facebook App, you can use the same App’s ID and Secret Key to configure the plugin. If not, go ahead and create one. 🙂
Here are the steps:
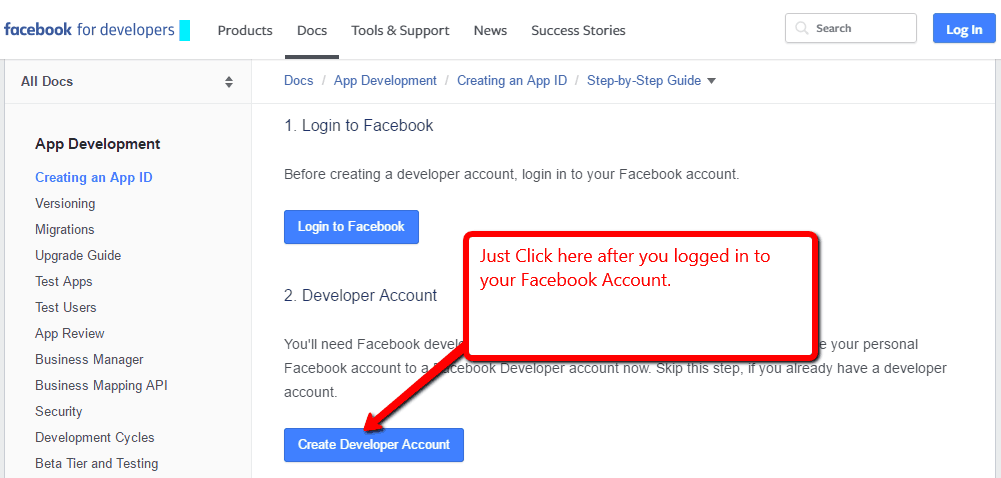
- Log in to your Facebook account.
- Create your Facebook Developer account here.
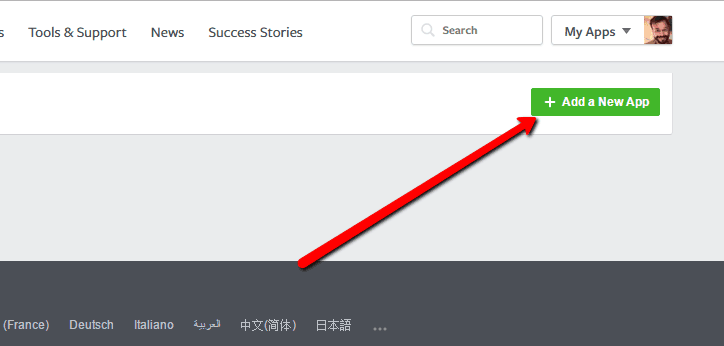
- Create your Facebook App here by clicking on Add a New App.
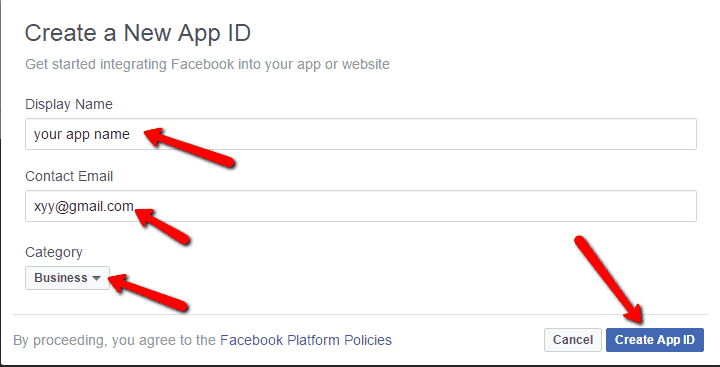
- Fill in the following fields – Display Name, Contact Email, and choose your business category. Once you are done, click Create App ID.
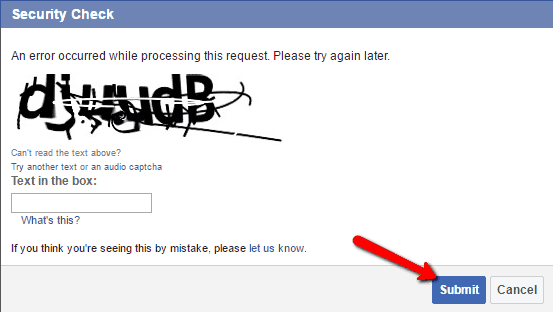
- You might be asked for a quick security check. Enter the letters in the text box and click Submit.
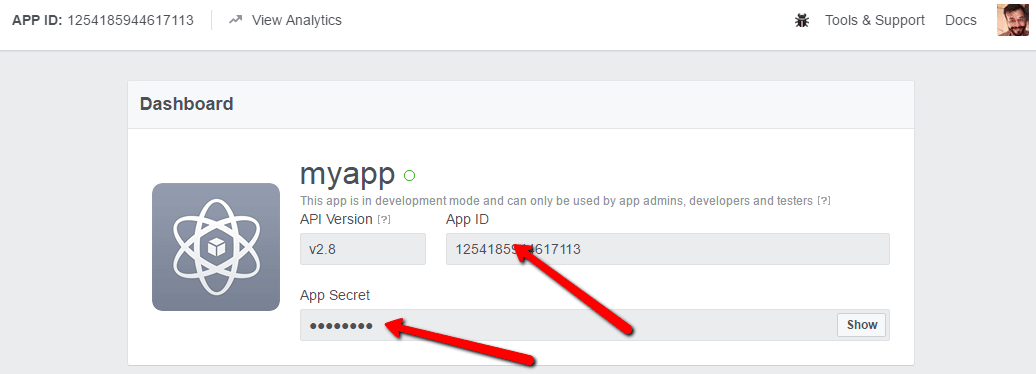
- Click on Dashboard.
- Get your App ID and Secret Key.
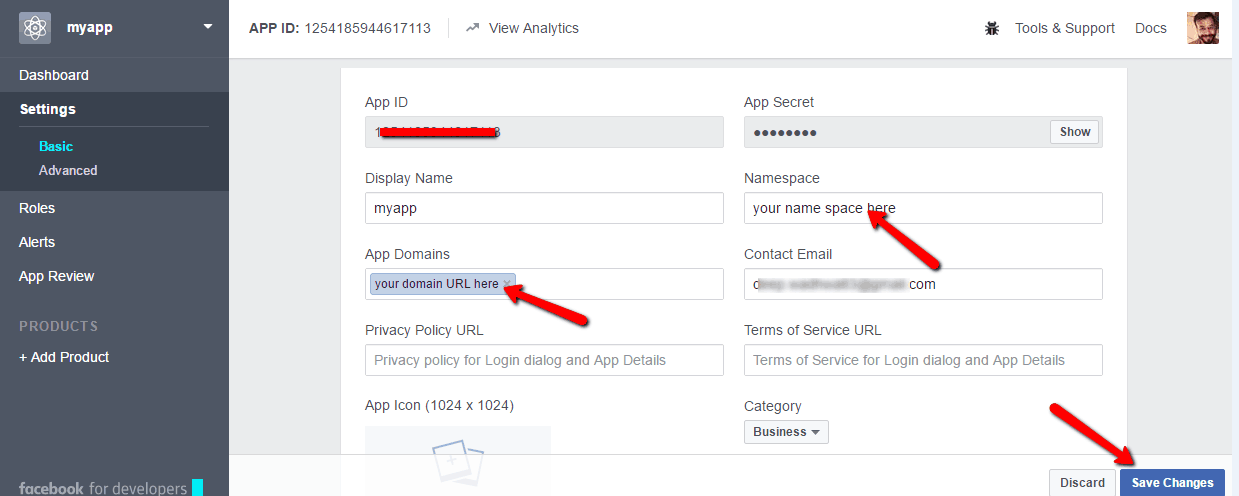
- Under “Settings”, add your Namespace, Domain URL, App Icon, etc. Once you are done, click Save Changes.
Connecting Nextend Facebook Connect with Facebook App
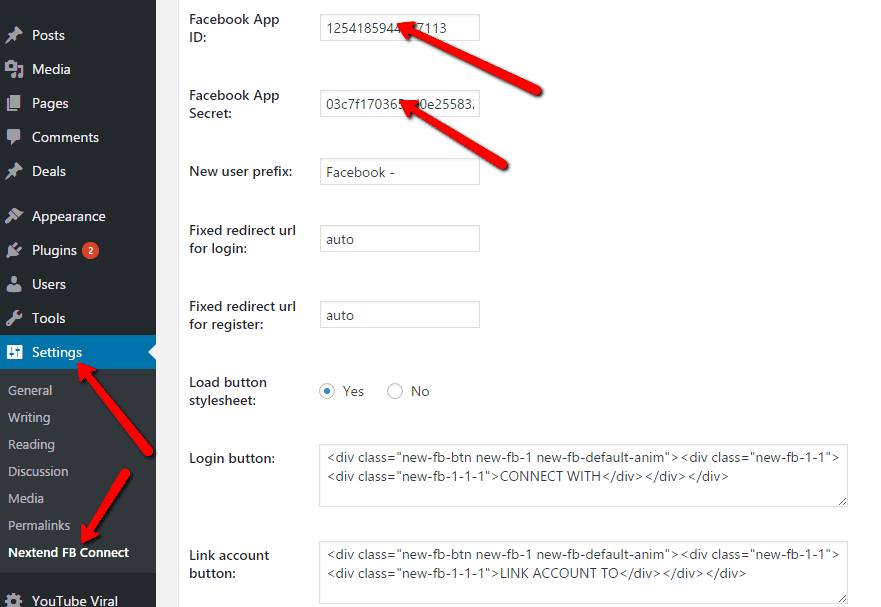
It’s time to configure the App ID and Secret Key into the Nextend FB Connect settings.
- In your WordPress dashboard, go to Settings >> Next FB Connect.
- Paste your App ID and Secret Key. Review the other options, and click on Save Changes.
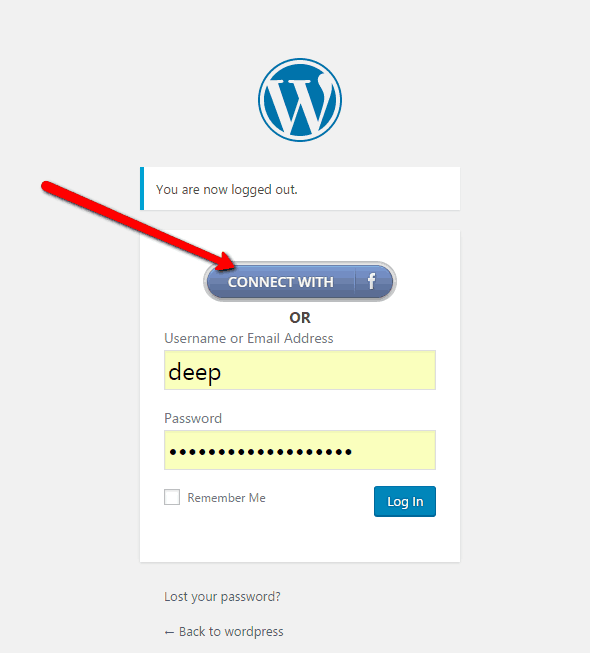
- Log out from your WordPress dashboard, and see the magic! 🙂
Note: Facebook takes some time to review the app before making it live. Once the app is live, you will see the Facebook login option on your website.
So, that’s it!
I hope the above tutorial helps you to add a Facebook login on your WordPress website. If you have any questions or need any help, do let us know in the comments section.
If you like this tutorial, do share it with your friends and colleagues!
You might also like reading the following guides:








ADD COMMENT